In today's digital world, having your favorite music available offline is more convenient than ever. Whether you want to play songs in the car, share tracks with friends, or create a personal backup, transferring music to a USB flash drive is a simple and practical solution. This guide will show you how to quickly and efficiently download music to a flash drive.

Part 1: What You Need Before Downloading Music to a Flash Drive
Before you start downloading music to a flash drive, it’s important to have everything ready for a smooth process. With the right setup, you can save time and avoid common issues.
First, you’ll need a USB flash drive with sufficient storage. The required space depends on the number of songs you plan to download, as well as the audio quality you choose. For most users, a 16GB or 32GB drive is more than enough for everyday use. Then, consider how you’ll obtain the music. If you’re downloading songs from online platforms or streaming services, you may find that they are not always saved in a format that can be directly transferred to a USB drive. In such cases, using a dedicated tool, for example, the music downloader introduced in Part 2, to convert tracks into common formats such as MP3, FLAC, WAV, or AAC can significantly simplify the process. You’ll also need a computer with a working USB port to manage the download and transfer.
With these essentials in place, you’re ready to move on and start downloading music to your USB flash drive step by step.
Part 2: How to Download Music from Different Sources
While many platforms allow you to download songs, not all downloaded files are saved in a format that can be transferred directly to a USB drive. In many cases, music downloaded from streaming services is stored in a protected format, meaning that even though the songs are available for offline playback within the app, they cannot be moved to external devices like a USB flash drive.
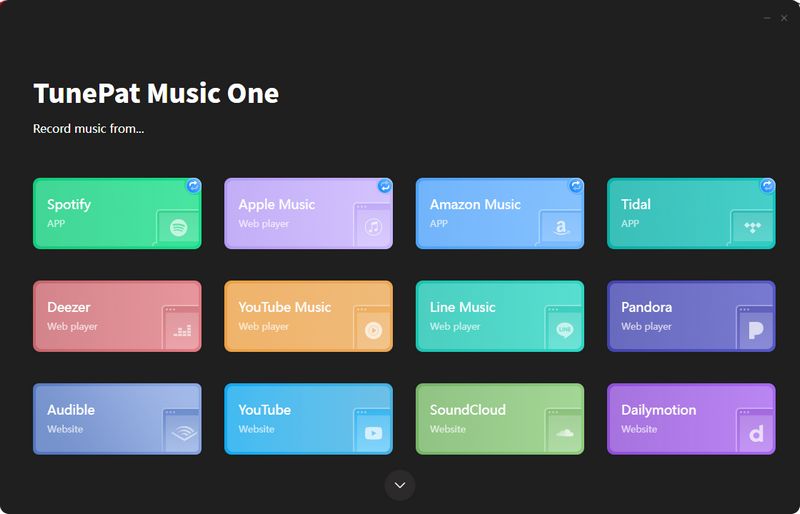
To simplify the process, the tool we introduced today, TunePat Music One, downloads and converts music into widely supported formats such as MP3, AAC, WAV, FLAC, AIFF, and ALAC. What's more, it supports individual tracks, playlists, and albums across multiple streaming platforms, including Spotify, YouTube, Apple Music, YouTube Music, Amazon Music, SoundCloud, Tidal, Deezer, etc. This means you only need one program to download songs from all your favorite streaming services. Once the music is saved locally in a common format, you can easily transfer music to your flash drive without any limitations.
TunePat Music One goes far beyond just downloading music. With conversion speeds up to 10 times faster, even large playlists can be saved in no time. At the same time, the software fully preserves ID3 tags, artist, album, genre, year, and more, so your music library stays organized without any manual work on your part. It also saves album artwork and lyrics along with your songs and preserves the original audio quality, making the sound exactly as it does on the streaming platform and the experience feel just as immersive. With these features combined, TunePat Music One not only helps you download music to a USB flash drive but also keeps your entire music collection clean, complete, and high-quality.
TunePat Music One
TunePat Music One is an all-in-one converter that can support any music streaming platform.
Step 1 Start by downloading TunePat Music One from the link above. Once the download is complete, double-click the file to install it on your computer. TunePat Music One works with multiple streaming platforms, and the steps are similar across all of them. In this guide, we'll use YouTube as an example. After launching the program, click the "YouTube" tab to open the built-in web player. If you want to access your playlists, simply log in to your YouTube account when prompted.
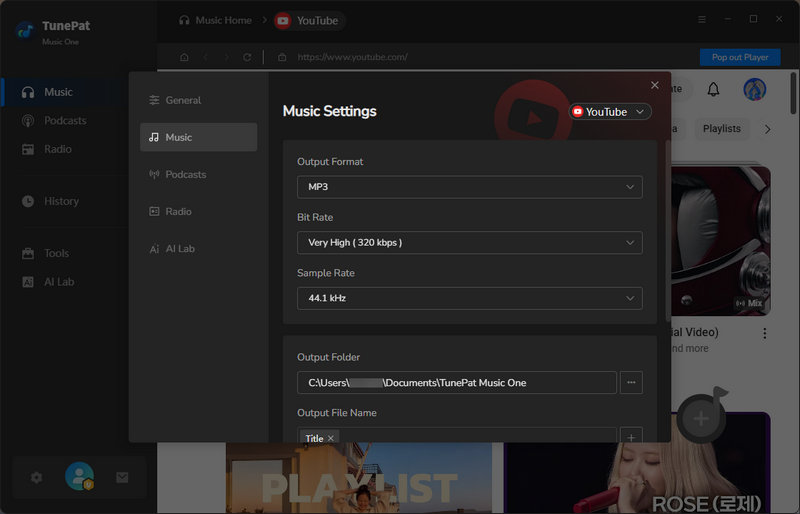
Step 2 Before downloading, we recommend configuring the output parameters. Click the "Settings" icon to open the settings interface. You can then select your desired output format, such as MP3, and adjust the bit rate and sample rate according to your audio quality needs. You can also decide where the converted files will be saved. To keep the original order of YouTube songs in your playlist, please keep "Playlist Index" and "Title" under "Output File Name". And, go to "Output Organized" and select "Playlist". After making changes, please save the settings; these settings will be retained for future conversions.
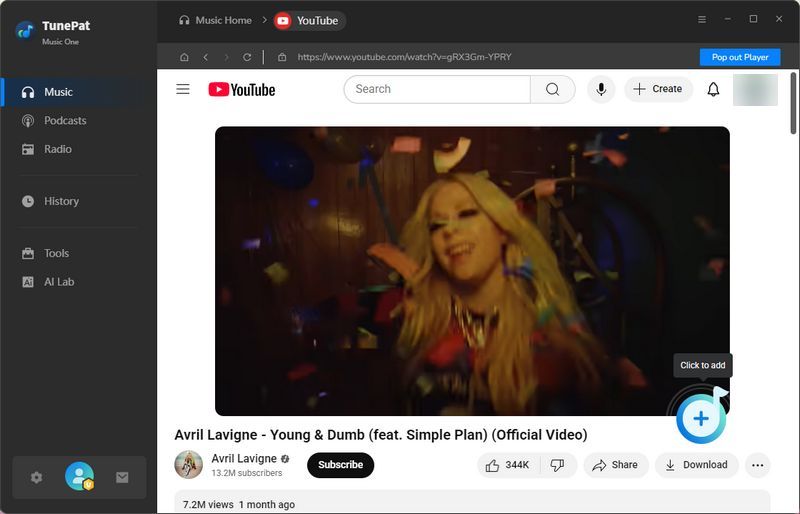
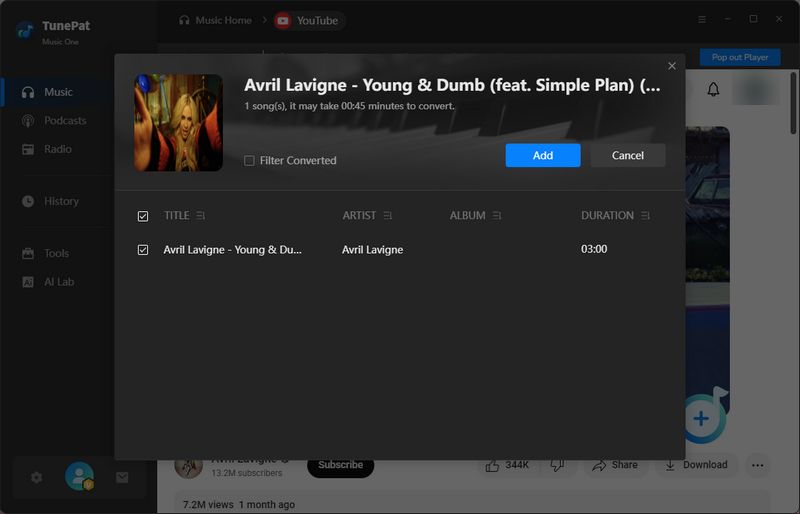
Step 3 Return to the YouTube web player within TunePat. Browse to find the video or playlist you want to convert. Once open, click the "+" button. TunePat will analyze the content, and a pop-up window will appear where you can select the desired songs. Click the "Add" button to import it into the conversion list. If you wish to skip already downloaded songs, you can enable the "Filter Converted" feature to avoid duplicates.
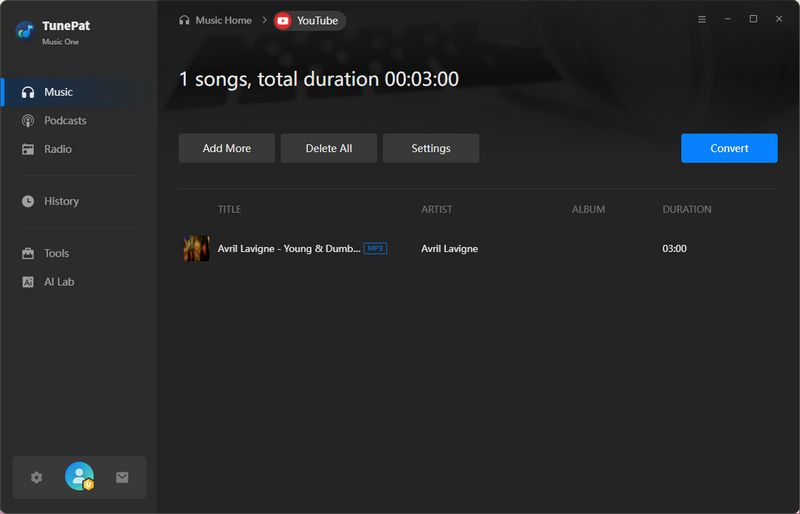
Step 4 After adding your first batch of songs, you'll see a page with multiple options. If you want to save multiple audio files simultaneously, click "Add More". Once ready, click "Convert", and TunePat will begin converting the songs at a speed 10 times faster than real-time.
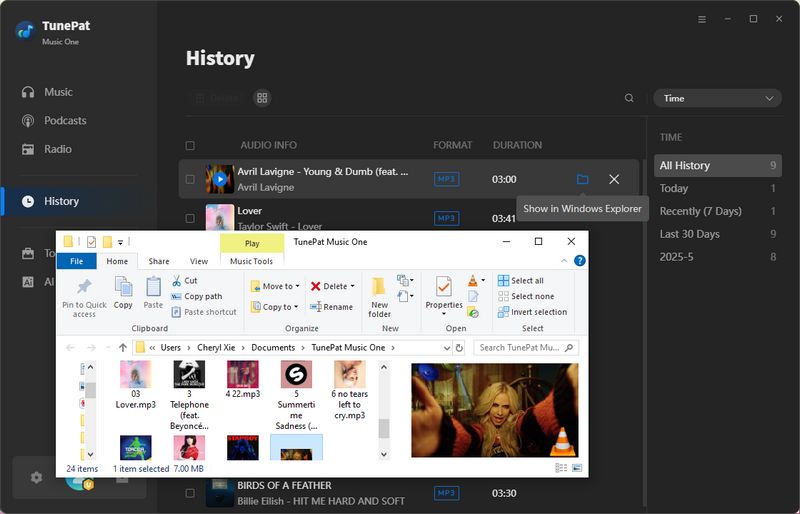
Step 5 Once the conversion is complete, the output folder containing the songs will usually open automatically. You can also access all previously converted files by clicking the "History" module on the left. Your music is now saved in your chosen format, including ID3 tags, album art, and lyrics (depending on your settings), and is ready to be transferred to your USB drive.
Part 3: How to Transfer Music to a Flash Drive
Now that your local music is ready, the final step is to transfer music to your USB drive. This process is simple, and you can choose from several easy methods below.
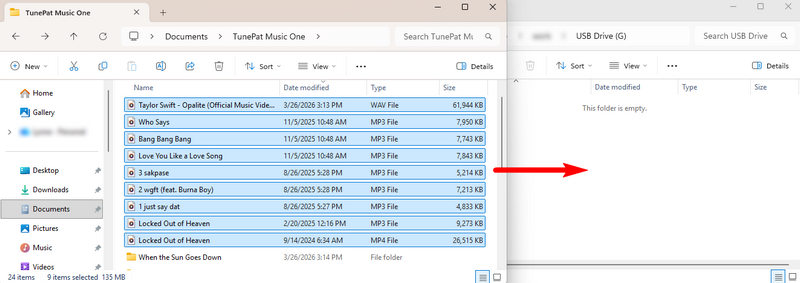
Method 1: Drag and Drop
Insert your USB flash drive into your computer and open it from File Explorer (Windows) or Finder (Mac) once it’s recognized. Then go to the folder where your downloaded music is stored, select the songs you want, and simply drag and drop them into the USB drive folder. This is the fastest and most commonly used method, especially if you only need to transfer a few files.
Method 2: Copy and Paste
This method is especially useful if you want more control over file selection or are transferring a large number of tracks. Simply select the music files, right-click and choose "Copy", then open your flash drive, right-click inside the folder, and select "Paste".
Method 3: Send to USB (Windows Only)
On Windows, there’s also a quick shortcut. Right-click on the selected music files, choose "Send to", and then select your USB flash drive from the list. This method saves a few clicks and is convenient for quick transfers.
After the transfer is complete, always eject your USB drive safely before unplugging it. This helps prevent file corruption or data loss. Once saved this way, your music files are stored locally on the USB drive, so they remain accessible even if your streaming subscription expires.
Part 4: FAQs About Downloading Music to a Flash Drive
Q1: Can I download music directly to a USB flash drive?
A: In most cases, no. Some streaming services may allow you to choose a USB drive as the output folder, but the entire process still requires downloading the files to your local device first. Furthermore, music files downloaded from streaming services are usually encrypted. It's recommended to use a tool like TunePat Music One to convert the music into a USB-compatible format.
Q2: Can I play music from a USB drive in my car?
A: Yes, most modern car audio systems support USB playback. However, please check if your car audio system supports the file formats you are using. MP3 is the most compatible format, but many systems also support AAC or WAV. If your music is in another format, you may need to convert it first. We recommend using TunePat Music One to organize your music into folders, such as by artist, album, or playlist. TunePat also saves ID3 tags, lyrics, and album art, which can be displayed on your screen to enhance your listening experience while driving.
Q3: What format should music be in for a USB drive?
A: The system supports a wide range of audio formats, including MP3, M4B, WMA, PCM, WAV, AAC, APE, and FLAC. Among these, the most widely supported formats are MP3, WAV, and AAC. MP3 is generally recommended because it offers a good balance between sound quality and file size, and it works with almost all devices.
Q4: How much music can a USB flash drive hold?
A: The number of songs a USB drive can hold depends on the drive's storage capacity and the audio quality of the files. Higher-quality files take up more space, while smaller, compressed formats allow you to store more. For example, a standard MP3 file at 128 kbps typically uses about 1 MB per minute of audio. With that estimate, a 16GB USB drive can hold roughly 3,000–4,000 songs, assuming an average song length of 3–4 minutes. If you opt for higher-quality MP3s at 320 kbps, the file size increases to about 2.5 MB per minute, reducing the total number of songs by about half. If you're using lossless formats like FLAC or WAV, files are significantly larger.
Q5: Will I lose my music if my subscription expires?
A: If you use TunePat to download music, the tracks are saved as standard audio files (such as MP3s) on your USB drive. This means they are not tied to any application, account, or subscription, so you never lose access, even if the streaming service removes the songs or your membership expires. In contrast, songs downloaded within a streaming app for offline playback are only available while your subscription is active. Once your subscription ends, those files become unplayable.
Conclusion
Whether you're on the go or simply want to keep a local backup, downloading music to a flash drive is a convenient way to enjoy your favorite songs anytime, anywhere. While transferring music to a USB is straightforward, the key is making sure your music is saved in a compatible format. Tools like TunePat Music One can help by letting you download music from multiple streaming platforms and convert it to standard audio files. If you're looking for a simple solution, it might be worth giving it a try.


Olivia Anderson
Senior Writer