
If you're a loyal Spotify user, you're likely curious about the songs you've listened to in the past, your favorite genres, preferred artists, and most frequently-played tracks. Fortunately, Receiptify offers a creative solution for Spotify users with this need. Users can customize and create a personalized receipt, essentially crafting their own individual music profile. In today's article, we'll delve into what Receiptify Spotify is and how to use Receiptify to create your own Spotify receipts. Keep reading for more details.
Part 1: What is Receiptify Spotify?
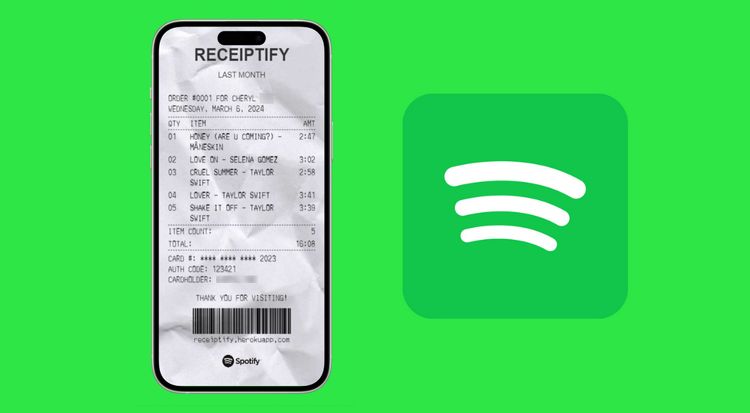
Following the trends of Icebergify, Wrapped, Spotify Obscurity, and others, Receiptify Spotify has begun to gain popularity and continued attention. So, what is Receiptify Spotify? Receiptify Spotify is a unique web application designed specifically for Spotify users. This application collects data and analyzes users' listening preferences and habits, and then presents these contents in the form of personalized and attention-grabbing receipts.
With your authorization, this platform visualizes some basic data from your Spotify account. You can customize the time period of the receipts, whether it's from last month, the past six months, or all time. Additionally, you can highlight your top artists, tracks, genres, and more.
Such a creative receipt interface is incredibly cool. Not only can you glimpse your music taste and preferences, but it also functions as a music personality test based on actual listening data rather than questionnaires. Furthermore, you'll likely want to share this receipt on social media platforms to share or discuss your favorite music with friends. Because of this, sharing Receiptify on platforms like Instagram is very simple.
Part 2: How to Use Receiptify Spotify & Download Your Spotify Receipts?
Using Receiptify to create Spotify receipts is very simple. Please follow the steps below:
Step 1 Open the browser on your computer or mobile phone and visit the Receiptify website.
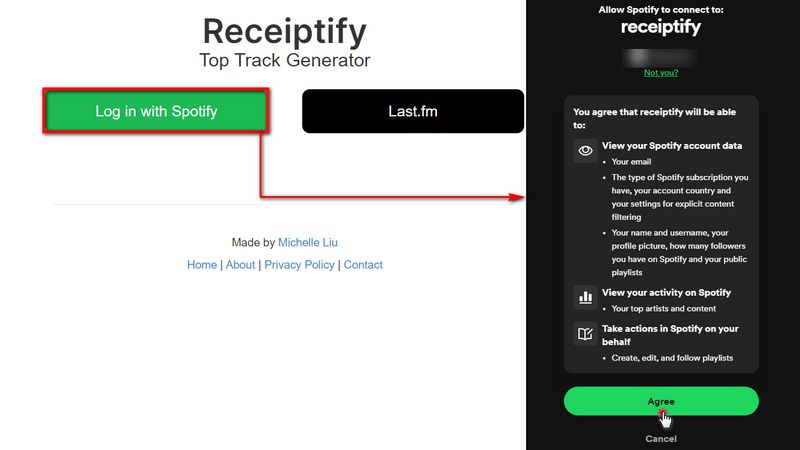
Step 2 Select the "Log in to your Spotify" button, and you will be redirected to the Spotify login page. If your account is already logged in, you will need to click "Agree" to authorize Receiptify. This authorization is necessary for creating your unique Spotify receipts.
Step 3 Receiptify will then automatically begin processing your Spotify data. Depending on the amount of data and activity, this process may take a few minutes. The website will generate receipts based on your listening history and preferences. As you can see on the right-hand side options, you can customize the content of your receipts. The Metric section allows you to choose from Top Tracks, Top Artists, Top Genres, Stats, and Search Albums. You can also select the time period to generate personalized Spotify receipts according to your preferences.
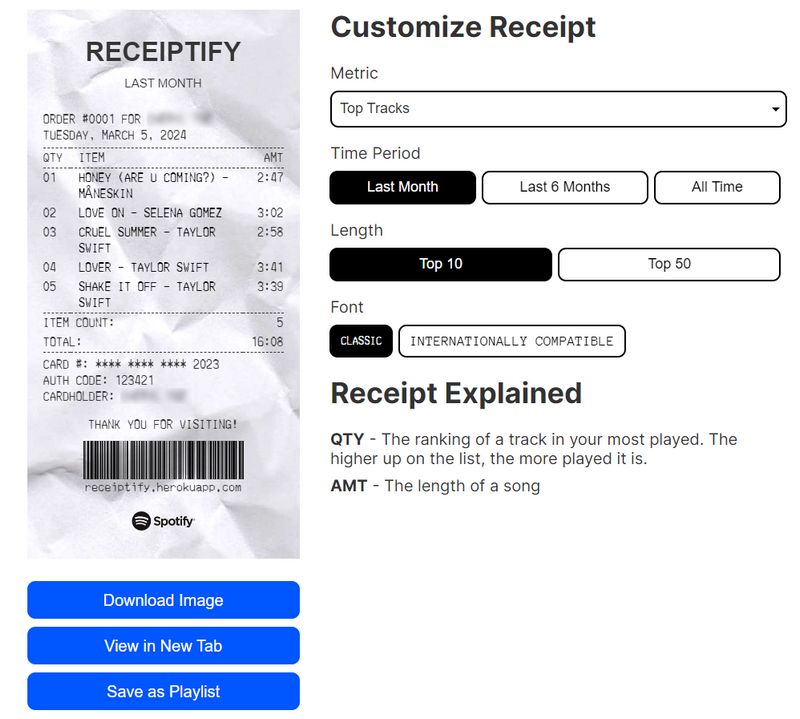
After completing the above steps, you will have the Spotify data you desire. You can perform further actions, such as clicking the blue "Download Image" button at the bottom left to download the receipt as a PNG file. However, the creators have mentioned on Twitter that the download option may encounter issues on mobile devices, so they recommend users take screenshots of their Spotify receipts. They also promised to resolve this issue as soon as possible.
Once you have successfully downloaded the Spotify receipt, sharing it on social media will be very easy. Simply find the image in your gallery, open your desired social media application such as Facebook, Instagram, TikTok, Snapchat, Pinterest, etc., upload the image, and click to share.
Part 3: How to Download & Keep the Tracks on Your Spotify Receipt Forever?
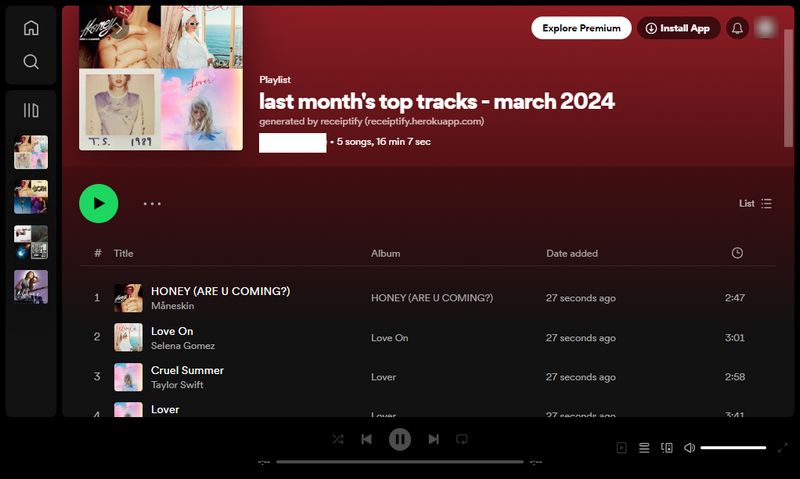
Receiptify creates a receipt-style graphic based on your Spotify listening history and shows your top songs, but it doesn't let you download them directly. Instead, you can click the "Save as Playlist" button in the bottom-left corner of the receipt to add these songs to a new Spotify playlist. As shown in the screenshot, the playlist is named "last month's top tracks - March 2024" by default, but you can rename it if you want. If you have Spotify Premium, you can then download the playlist for offline listening.
If you don't have a Premium account and don't want to upgrade, TunePat Spotify Converter is another option. It lets you save Spotify songs, albums, playlists, and podcasts to your computer for offline listening without relying on Spotify's offline download feature.
Whether you use Spotify Free or Premium, TunePat supports batch conversion to MP3, AAC, WAV, FLAC, AIFF, or ALAC at up to 40X speed. It also keeps the original audio quality and ID3 tags, making it easy to save your Spotify playlists as local audio files.
TunePat Spotify Converter
Step 1 Open TunePat Spotify Converter on your computer. If you access songs through the App, the audio quality will be better. However, if you're not particularly concerned about audio quality and just want to get and download Spotify playlists to your desired format in the most convenient way, choose the Web player option. Then, you need to log in to your Spotify account in the pop-up Spotify app or embedded Spotify web player window.
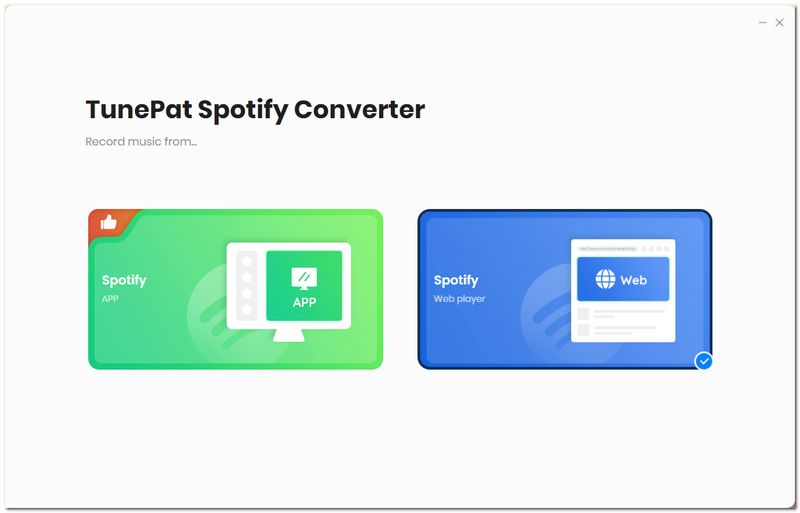
Note: The steps below apply to all Spotify accounts, though sound quality varies. Spotify Free accounts typically max out at 160 kbit/s, while Spotify Premium accounts boast the highest quality at 320 kbit/s.
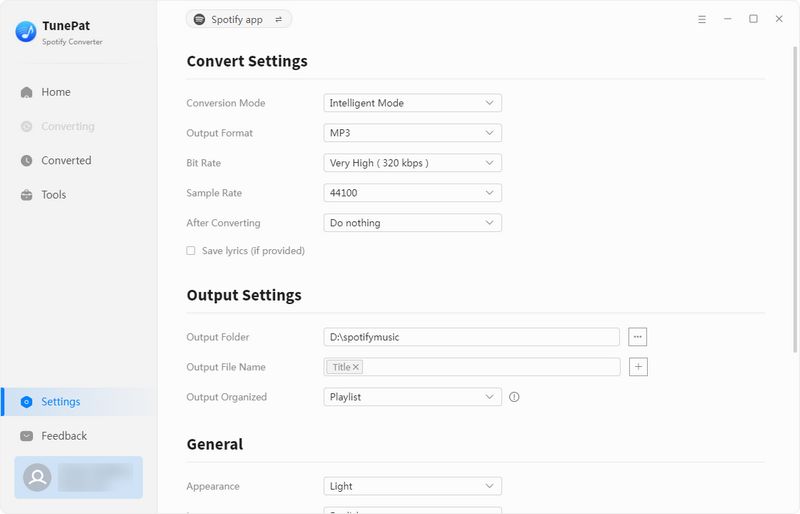
Step 2 After logging in, don't rush to start converting songs. First, click the "Settings" button at the bottom left corner of the main page to customize some necessary output parameters.
For example, if you want to get Spotify music in MP3 format, change the output format from "Auto" to "MP3". Other parameters can also be modified as needed, such as bitrate, sample rate, output file name, etc. If you want the Spotify playlists generated by Receiptify to be output and saved in the order of playlists, select the "Playlist" option in the "Output Organized" section.
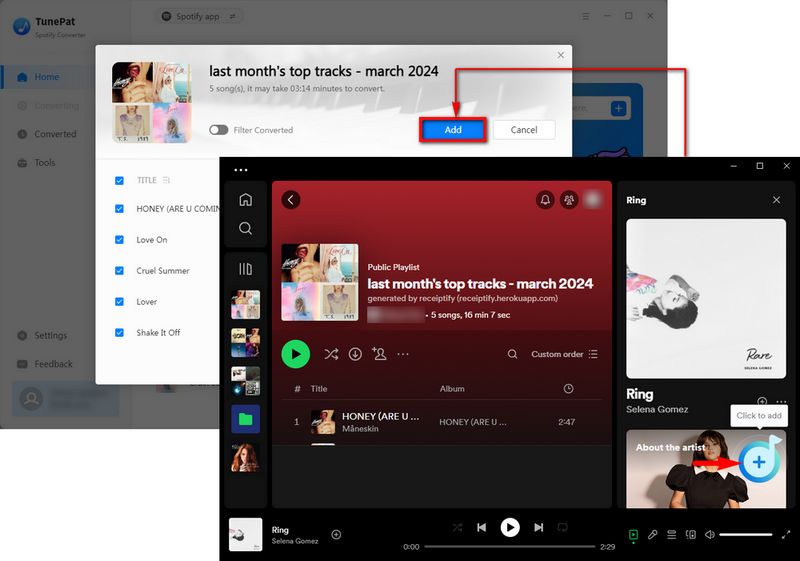
Step 3 After completing the settings, go back to your Spotify library and open the newly generated "last month's top tracks - March 2024" playlist. Click the "Click to add (+)" button in the bottom right corner, and TunePat will automatically read the contents of this playlist.
After reading, it will be displayed in a pop-up window and selected by default. Simply click "Add", then click "Convert" on the redirected page to start the conversion.
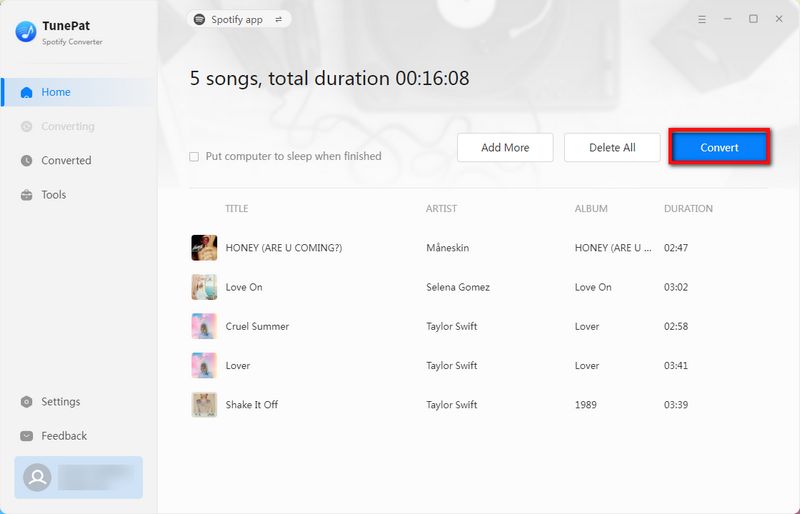
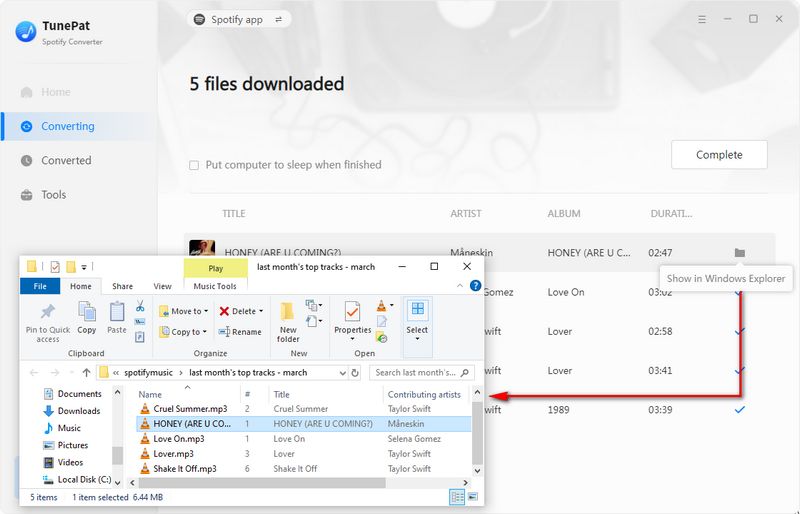
The conversion process will be completed at lightning speed. After conversion, the output folder will automatically pop up, and you can play and browse the converted songs locally or in the "History" module. Now, your top songs are not only displayed in the form of receipts but also become real audio files that you can enjoy anytime, even without an internet connection.
Conclusion
Clearly, Receiptify Spotify offers Spotify users a fresh way to obtain results reflecting their music preferences. These data-driven graphics bring otherwise mundane song titles to life, making them more engaging. In addition to Spotify, users can also generate personalized receipts by connecting to other streaming services like Apple Music and Last.fm, showcasing their musical tastes and connecting with like-minded music enthusiasts.
Meanwhile, the amazing TunePat Spotify Converter helps you permanently save your most listened-to Spotify songs. You can download these Spotify MP3 files and store them on USB drives, Google Drive, external hard drives, or any other preferred location.



Olivia Anderson
Senior Writer